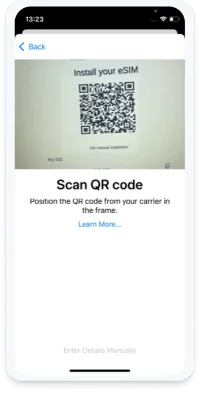
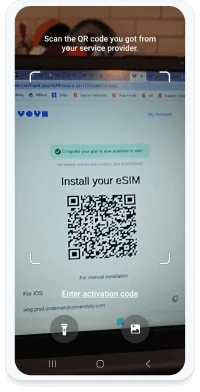
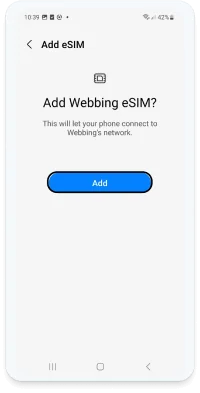
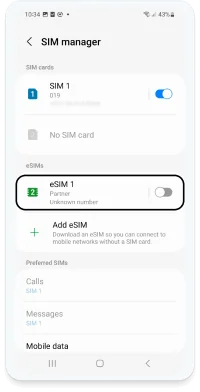
- To scan the QR code, it must be displayed on another screen or device. With iOS 17.4 or later, a second device isn’t needed—just follow the steps here.
- A stable internet connection is mandatory to successfully complete the process.
- The QR code can only be scanned once. It isn’t possible to transfer it to another device (even if you have purchased a new one).
- Please do not remove the eSIM from your device as it cannot be used again afterward.
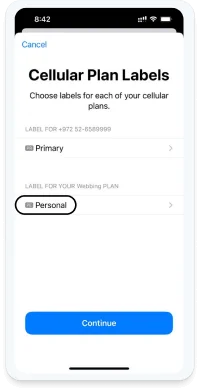
- We recommend you label your new eSIM as “VOYE” to avoid confusion.
- We also recommend checking out this article about Useful Tips for Correct Usage Abroad.
Installation Guide How to install?
Find detailed instructions including a video and important tips about how to install your eSIM to your Android or IOS device

How to install?
-
1
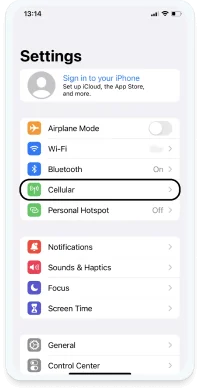
Go to "Settings" > "Cellular" (or "Mobile Service")
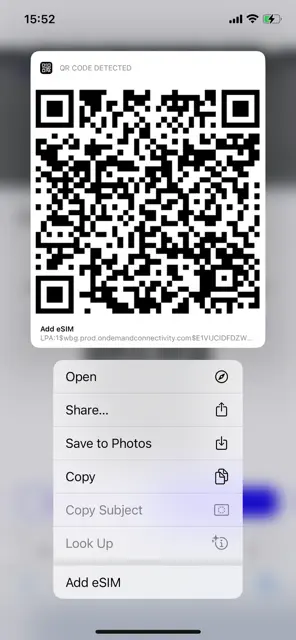
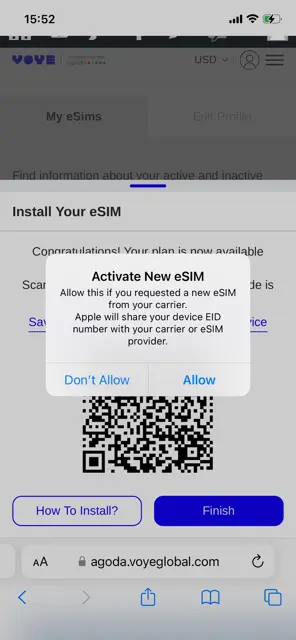
*For iOS 17.4 and above customers, simply long press on the QR code on your iPhone, click "Add eSIM" on the menu, click "Allow" on the "Activate New eSIM" pop up and go to step 5 on this page.
-
2
Click "Add eSIM”
-
3
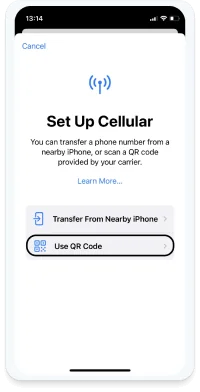
Click "Use QR code"
-
4
Scan your QR code:
*Note that the QR code must be present on another screen or device
-
5
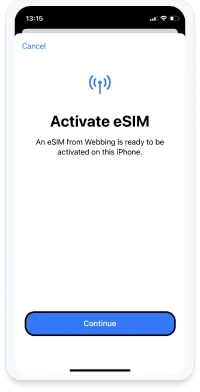
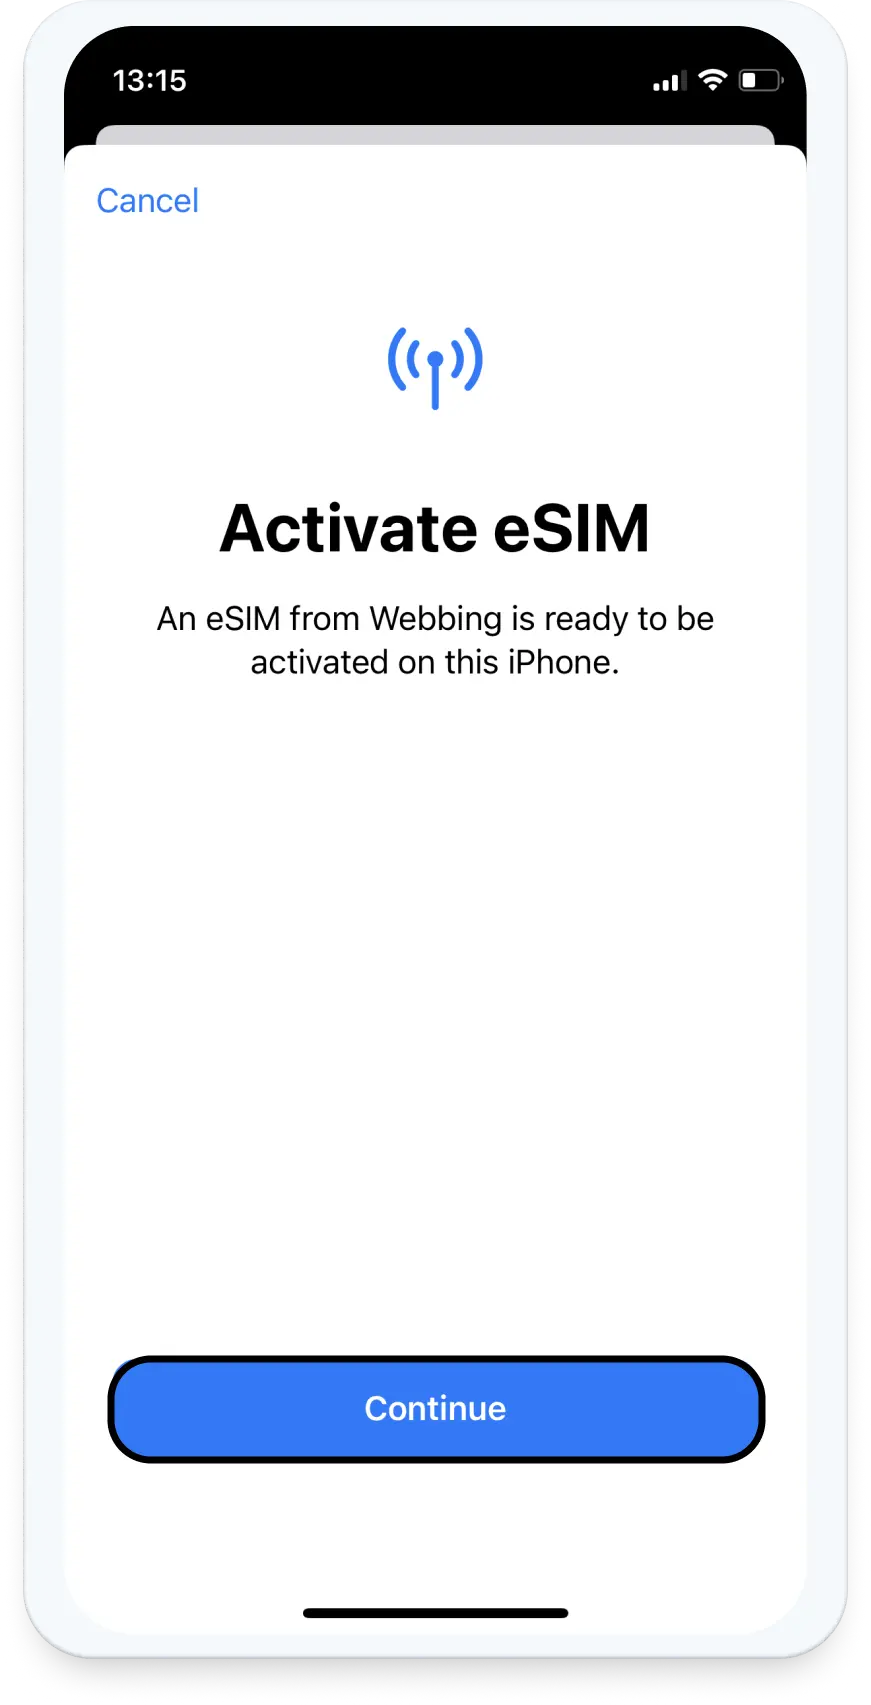
Click “Continue”:
*Note that this step might take a few moments.
-
6
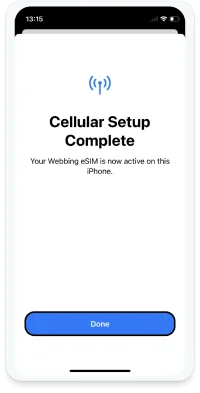
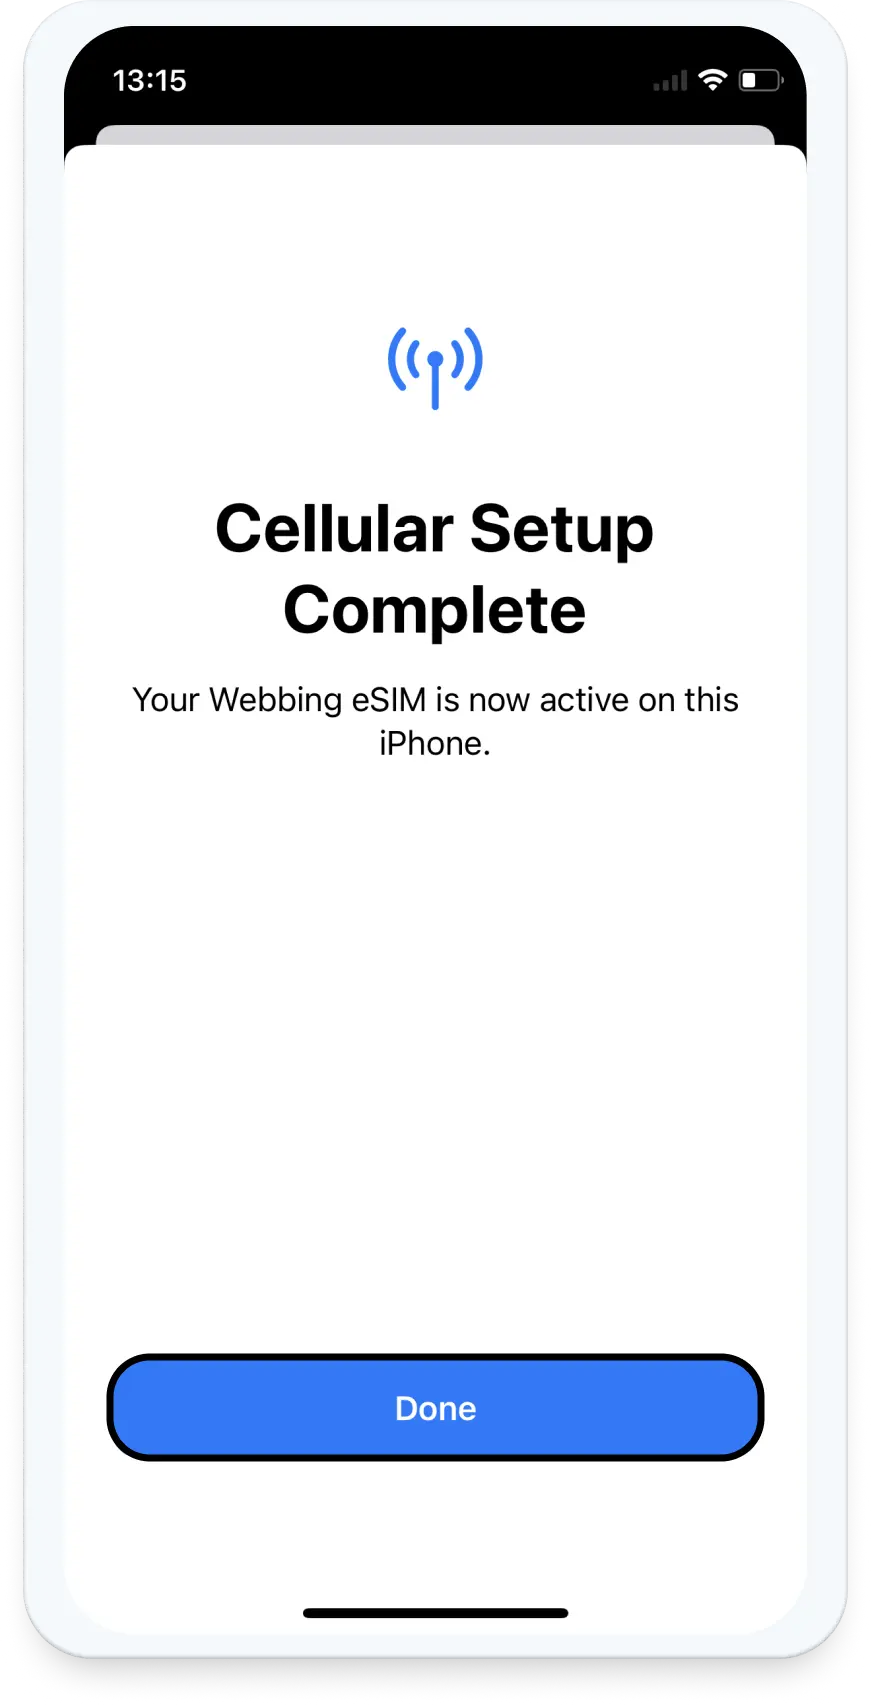
Click "Done"
-
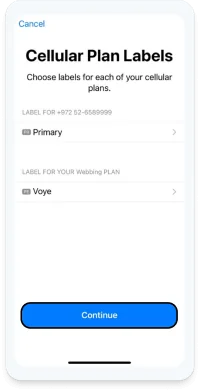
7
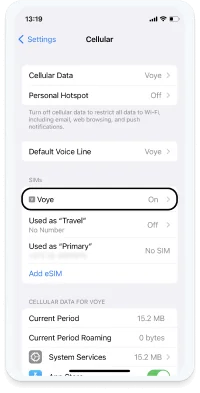
Click the eSIM that was added under
"Cellular Plan Labels" to rename your eSIM.
(The initial eSIM name might be "Webbing" - that is ok)
-
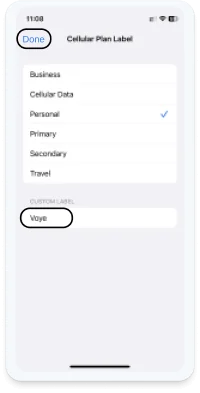
8
Update your eSIM name to "Voye" and
click on "Done" on the upper right side
-
9
Click "Continue"
-
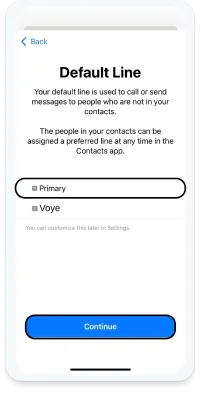
10
Continue with the installation process
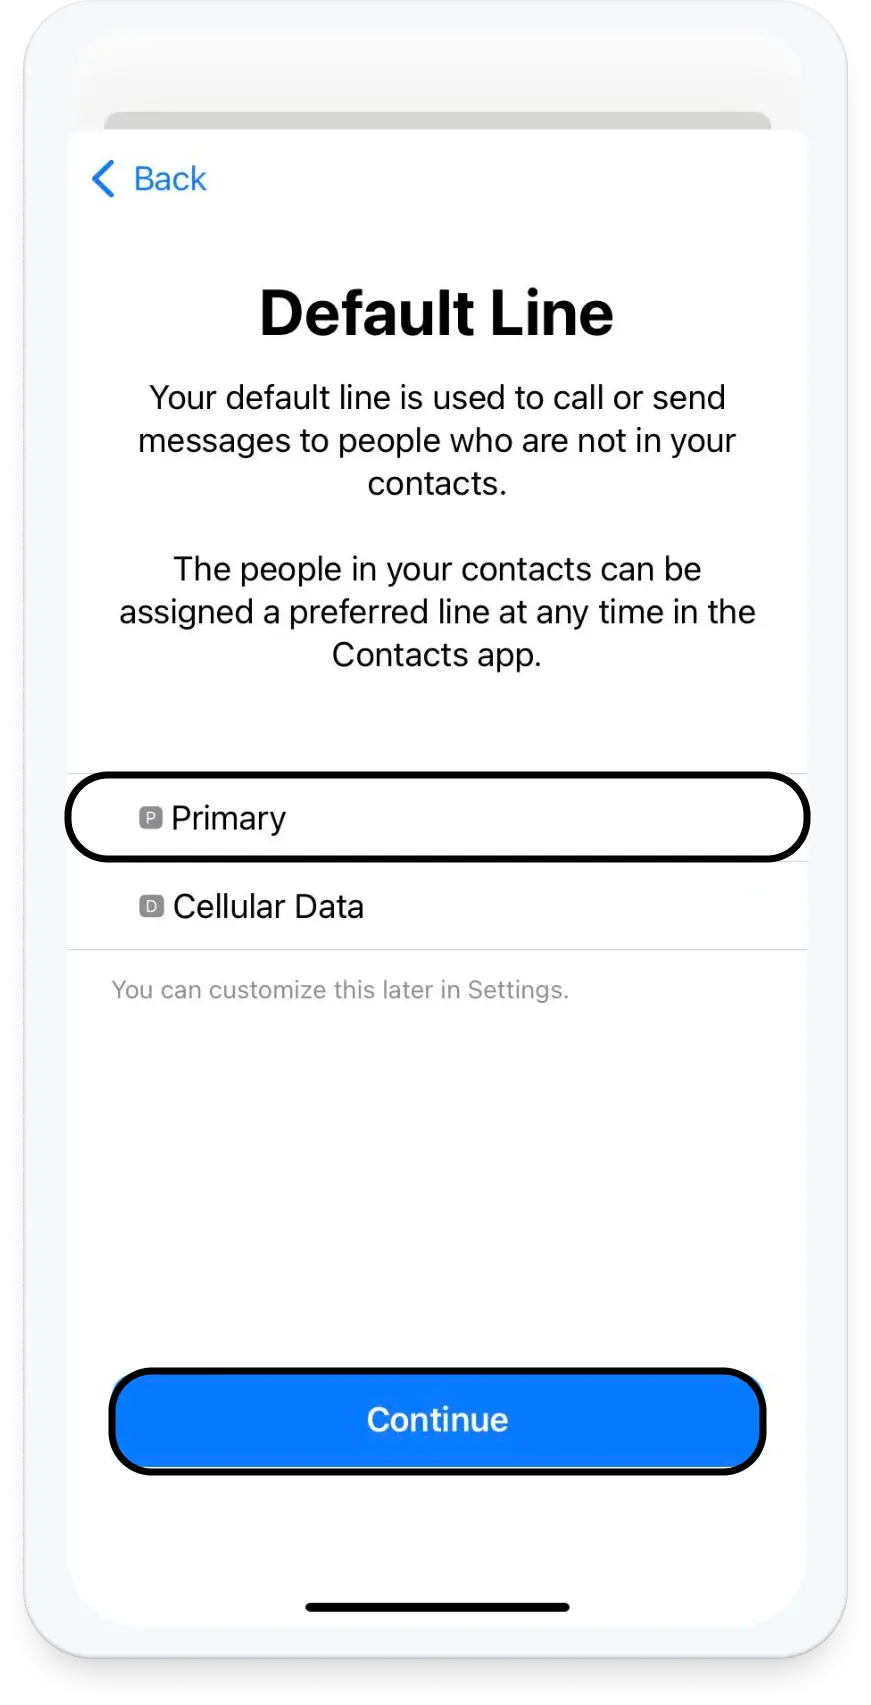
and mark “Primary” for “Default Line”
-
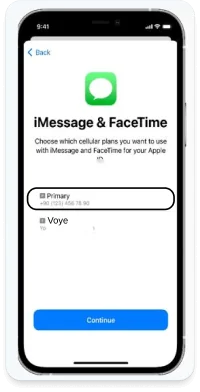
11
Continue with the installation process
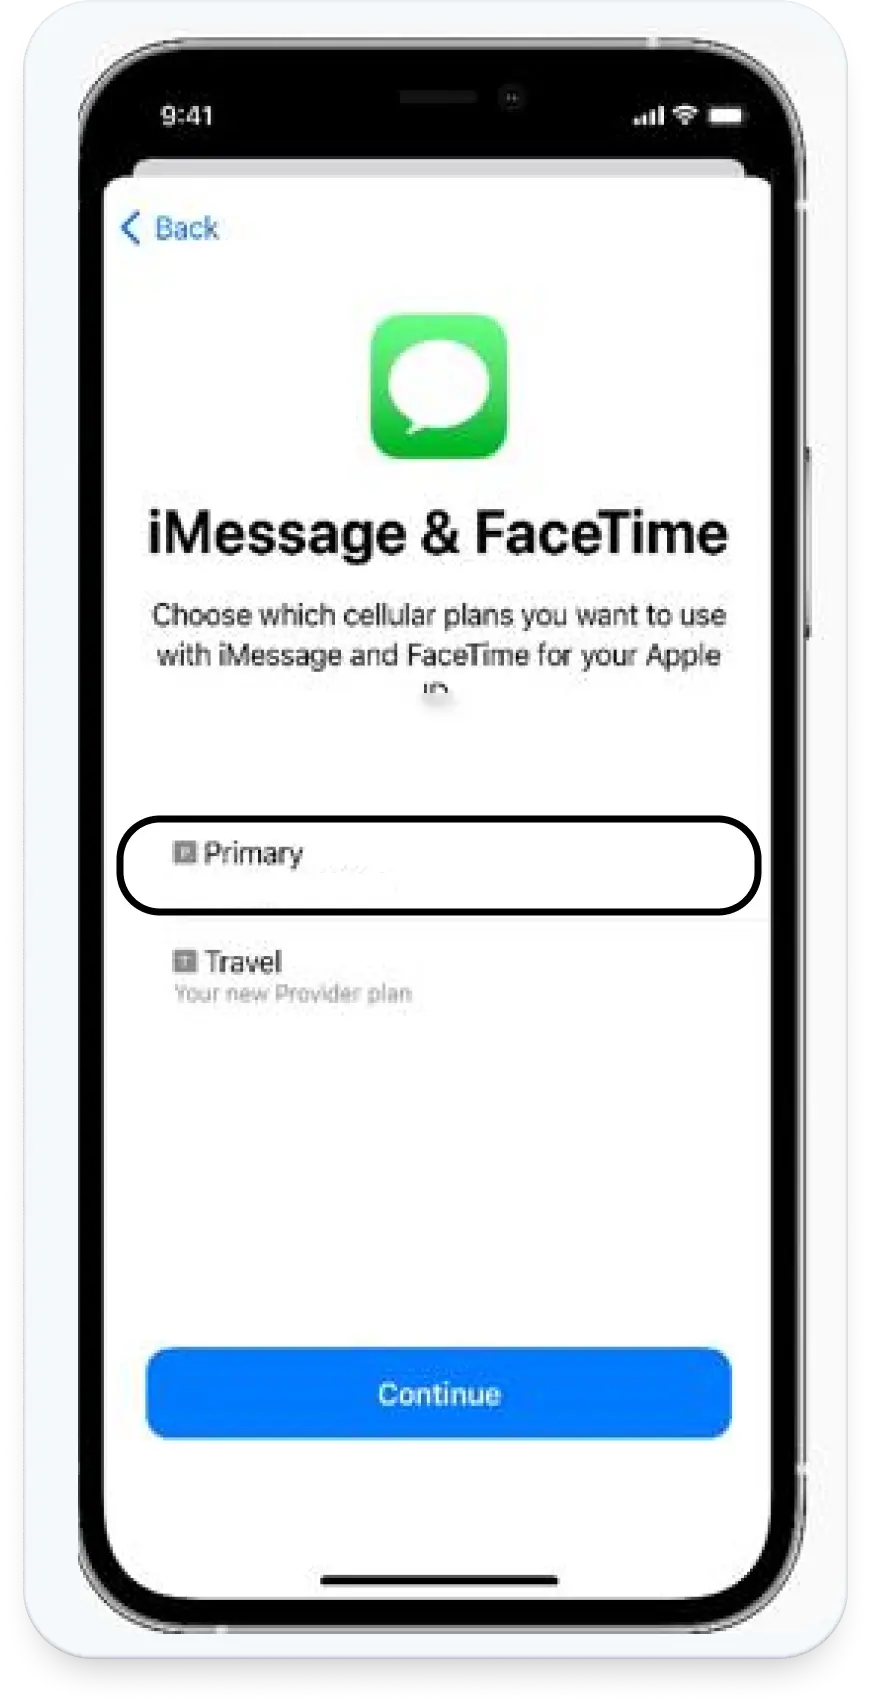
and mark “Primary” for iMessage & FaceTime”
-
12
Congratulations!
Your eSIM was successfully installed.
-
So What now? How can you check that everything works before your flight?
After your purchase, we add a complimentary 100MB plan to your eSIM to check that everything works already in your home country. There is no extra cost to check the success of the installation.
To check that your eSIM indeed works:
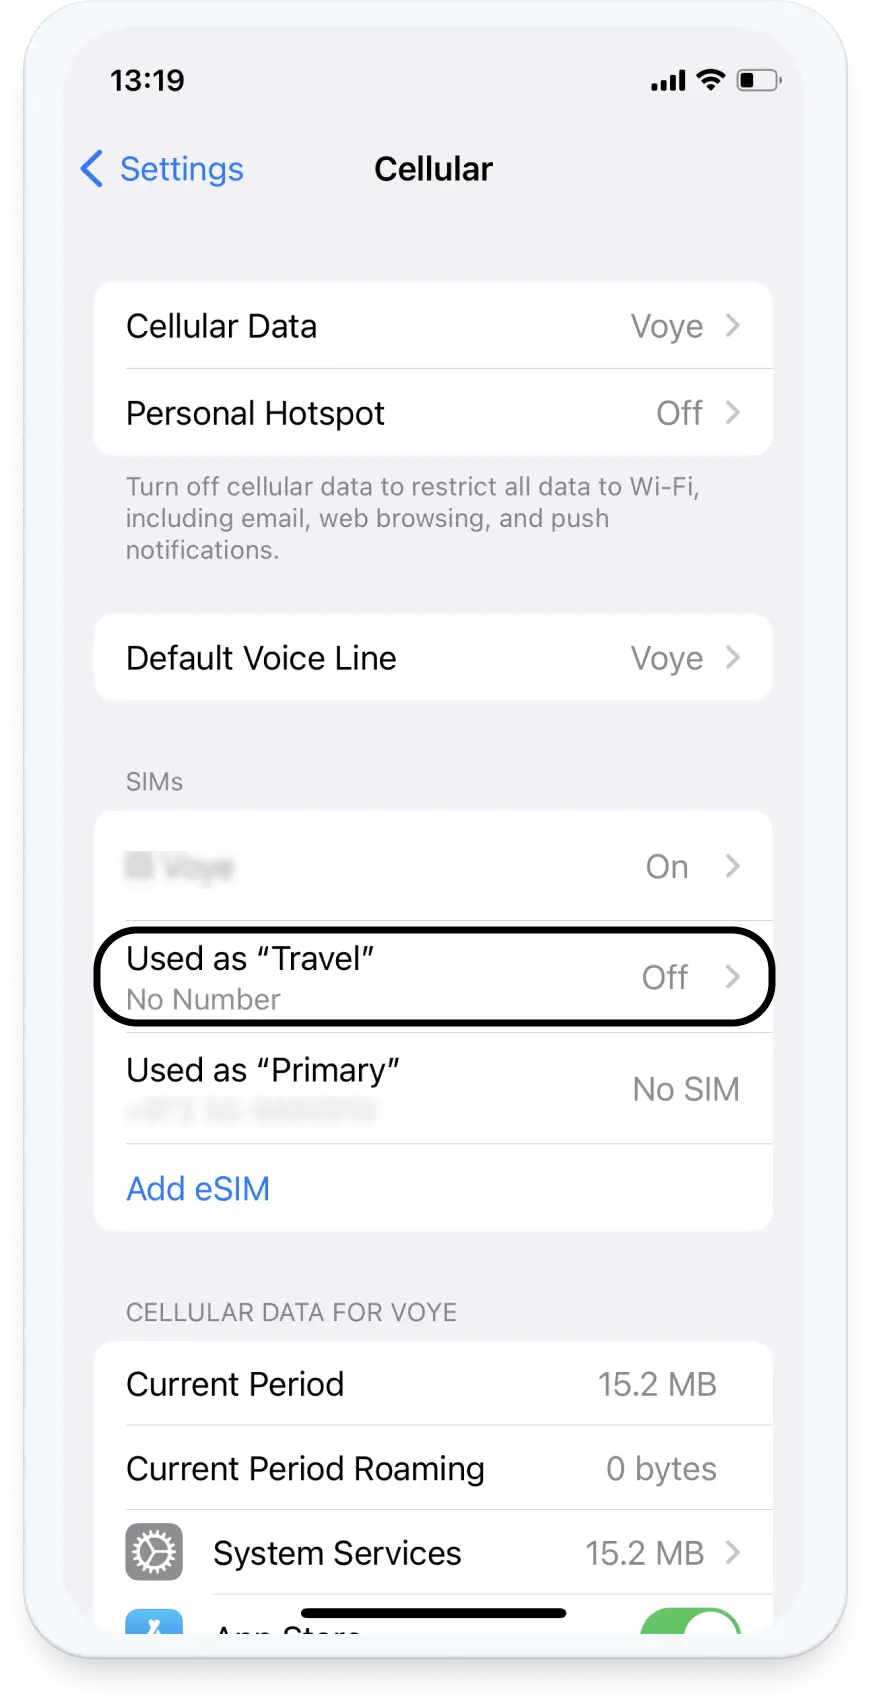
- Click “Settings” > “Cellular” (or “Mobile Service”).
- Enable your eSIM (our eSIM will show “Webbing” inside.)
- Disable your Wi-Fi.
- Try using the internet. Note that the initial synchronization might take a few minutes.
Did it work? Great 🙂 You can disable your eSIM again until you land at your destination. Doesn’t work? We are here to help! You can contact us via chat, WhatsApp or via the “Contact Us” page
-
Did you land at your destination? Great! All that's left is to activate your eSIM.
To activate your eSIM abroad:
- Click on “Settings” > “Cellular” (or “Mobile Service”).
- Enable your eSIM.
- Enable “Data Roaming” (when clicking on your eSIM).
- Make sure “Allow Cellular Data Switching” is disabled in “Cellular Data”.
We are happy to help! You can contact us via chat, WhatsApp or via the “Contact Us” page
-
Are you still abroad but your plan has run out?
Before your plan is about to run out, you will receive a message from us when your plan has reached its last 20%. You will receive it in a few ways: Via an eMAIL- this is the default option and you will receive it in any case. Via an SMS- Make sure your primary line is able to receive SMS messages (note that your operator might add additional charges to receive SMS and calls. Receiving an SMS is crucial for the authentication process).
Clicking the link on the Email / SMS or message, will direct you to our plans page where you can choose the plan of your choice. You will receive an SMS for authentication reasons so please make sure your Primary line is active.
After choosing a new plan, you can add it to your existing eSIM 🙂
This option is available while purchasing a plan. Mark this option and the plan will be added automatically to your existing eSIM without a need to scan or activate it again.
-
Are you back? Welcome home, we hope you enjoyed your trip!
The only thing left to do is to enable your Primary SIM and:
- Click on “Settings” > “Cellular” (or “Mobile Service”).
- Click on your eSIM.
- Disable “Data Roaming”.
- Disable the “Turn On this Line” toggle to disable your eSIM.
How to install?
- A stable internet connection is mandatory to successfully complete the process.
- The QR code can only be scanned once. It isn’t possible to transfer it to another device (even if you have purchased a new one).
- Please do not remove the eSIM from your device, as it cannot be used again afterward.
- We recommend you label your new eSIM as “VOYE” to avoid confusion.
- We also recommend checking out this article about Useful Tips for Correct Usage Abroad.
-
1
Long press on the QR code on your iPhone and click "Add eSIM" on the menu.
-
2
Click "Allow" on the "Activate New eSIM" pop up.
-
3
Click “Continue” when the button pops up:
*Note that this step might take a few moments.
-
4
Click "Done".
-
5
Click the eSIM that was added under "Cellular Plan Labels" to change the name of your eSIM.
(The initial eSIM name might be "Webbing" - that is ok) -
6
Update your eSIM name to "Voye" and click on "Done" on the upper right side. -
7
Click "Continue". -
8
Continue with the installation process and mark “Primary” for “Default Line”.
-
9
Continue with the installation process and mark “Primary” for iMessage & FaceTime”.
-
10
Congratulations! Your eSIM was added to your “Cellular” page.
-
So What now? How can you check that everything works before your flight?
After your purchase, we add a complimentary 100MB plan to your account to check that everything works already in your home country. There is no extra cost to check the success of the installation.
To check that your eSIM indeed works:
- Click “Settings” > “Cellular”.
- Enable your eSIM (our eSIM will show “Webbing” inside.)
- Turn your Wi-Fi off.
- Try using the internet. Note that the initial synchronization might take a few minutes.
Did it work? Great 🙂 You can turn your eSIM off again until you land at your destination. Doesn’t work? We are here to help! You can contact us via chat, WhatsApp or via “Contact Us” page
-
Did you land at your destination? Great! All that's left is to activate your eSIM.
To activate your eSIM abroad:
- Click on “Settings” > “Cellular”.
- Enable your eSIM.
- Enable “Data Roaming” (when clicking on your eSIM).
- Make sure “Allow Cellular Data Switching” is disabled in “Cellular Data”.
We are happy to help! You can contact us via chat, WhatsApp or via the the “Contact Us” page
-
Are you still abroad but your plan has run out?
Before your plan is about to run out, you will receive a message from us when your plan has reached its last 20%. You will receive it in a few ways: Via an eMAIL- this is the default option and you will receive it in any case. Via an SMS- Make sure your primary line is able to receive SMS messages (note that your operator might add additional charges to receive SMS and calls. Receiving an SMS is crucial for the authentication process).
Clicking the link on the Email / SMS or message, will direct you to our plans page where you can choose the plan of your choice. You will receive an SMS for authentication reasons so please make sure your Primary line is active.
After choosing a new plan, you can add it to your existing eSIM 🙂
This option is available while purchasing a plan. Mark this option and the plan will be added automatically to your existing eSIM without a need to scan or activate it again
-
Are you back? Welcome home, we hope you enjoyed your trip!
The only thing left to do is to enable your Primary SIM and:
- Click on “Settings” > “Cellular”.
- Click on your eSIM.
- Disable “Data Roaming”.
- Disable the “Turn On this Line” toggle to disable your eSIM.
How to install?
- To scan the QR code, it must be displayed on another screen or device.
- A stable internet connection is mandatory to successfully complete the process.
- The QR code can only be scanned once. It isn’t possible to transfer it to another device (even if you have purchased a new one).
- Please do not remove the eSIM from your device, as it cannot be used again afterward.
- We recommend you label your new eSIM as “VOYE” to avoid confusion.
- We also recommend checking out this article about Useful Tips for Correct Usage Abroad.
-
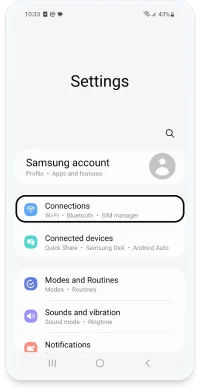
1
Go to “Settings” > “Connections”
-
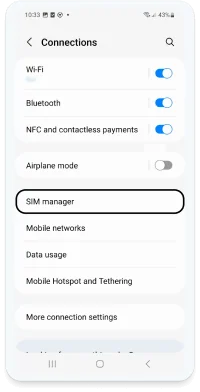
2
Click “SIM manager”
-
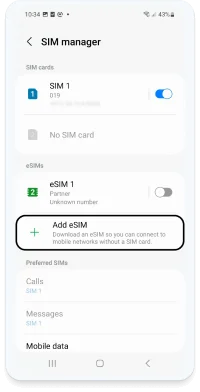
3
Click “Add eSIM”
-
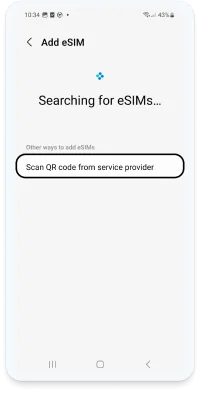
4
Click “Scan QR code from service provider”
-
5
Scan your code:
*Note that the QR code must be present on another screen or device
-
6
Click “Add”
*Note that this step might take a few moments
-
7
Congratulations!
Your eSIM was added to your “SIM manager”.
Note that under Preferred SIMs:
“Calls” should be set on your SIM.
“Messages” should be set on your SIM.
“Mobile data” should be set on your eSIM.
-
So What now? How can you check that everything works before your flight?
After your purchase, we add a complimentary 100MB plan to your account to check that everything works already in your home country. There is no extra cost to check the success of the installation.
To check that your eSIM indeed works:
- Click “Settings” > “Connections” > “SIM Manager”.
- Enable your eSIM (and disable your Primary SIM).
- Turn your Wi-Fi off.
- Try using the internet. Note that the initial synchronization might take a few minutes.
Did it work? Great 🙂 You can turn your eSIM off again until you land at your destination. Doesn’t work? We are here to help! You can contact us via chat, WhatsApp or via “Contact Us” page
-
Did you land at your destination? Great! All that's left is to activate your eSIM.
To activate your eSIM abroad:
- Click on “Settings” > “Connections” > “SIM Manager”.
- Enable your eSIM.
- Make sure “Mobile data” is set on your eSIM.
- Make Sure “Data Roaming” is enabled in “Settings” > “Connections” > “Mobile networks”.
Doesn’t work? Please go to “Settings” > “Connections” > “Mobile networks” > “Access Point Names.” Click on your eSIM at the bottom of the page. Please contact us and let us know if you see wbdata in one of the options We are happy to help! You can contact us via chat, WhatsApp or via the “Contact Us” page
-
Are you back? Welcome home, we hope you enjoyed your trip!
The only thing left to do is to:
- Click on “Settings” > “Connections” > “SIM manager.”
- Disable your eSIM.
- Enable your Primary line.
- Make Sure “Data Roaming” is disabled in “Settings” > “Connections” > “Mobile networks”.